![](https://lh6.googleusercontent.com/_eG-h-3kiVVA/TAlvFVb7u0I/AAAAAAAAAzk/-FCr1TSAsrk/s400/DSCF2107.jpg)
Here are the entrance gates, with the turnstiles, as you approach the ground. I gained access through a gap down behind the left hand side of the ground.
![](https://lh6.googleusercontent.com/_eG-h-3kiVVA/TAlvIG5kz6I/AAAAAAAAAzo/t4a9hdsHB2k/s400/DSCF2108.jpg)
Just inside the turnstiles.
![](https://lh3.googleusercontent.com/_eG-h-3kiVVA/TAlucLoZENI/AAAAAAAAAyc/HUsLNZDNu2M/s400/DSCF2090.jpg)
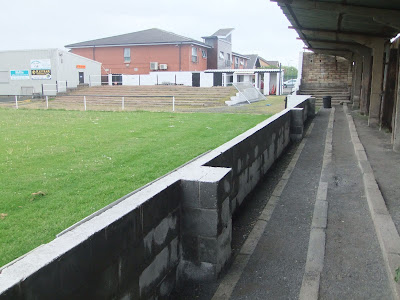
Steps straight ahead lead up to the open terrace to the left of the goal, at this end.
![](https://lh6.googleusercontent.com/_eG-h-3kiVVA/TAluWSIPZ_I/AAAAAAAAAyQ/nnXtIsOD4sY/s400/DSCF2087.jpg)
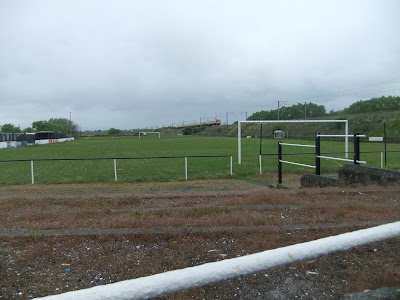
Here we are standing behind the terrace, looking down the pitch.
![](https://lh3.googleusercontent.com/_eG-h-3kiVVA/TAluUe6MTJI/AAAAAAAAAyM/R_BWPm6l4zM/s400/DSCF2086.jpg)
To the right is the social club & changing rooms.
![](https://lh5.googleusercontent.com/_eG-h-3kiVVA/TAluRcB60FI/AAAAAAAAAyE/2gXKOT84-Hg/s400/DSCF2084.jpg)
Behind this end, next to the turnstiles, is the open toilet block.
![](https://lh5.googleusercontent.com/_eG-h-3kiVVA/TAluPkS9LRI/AAAAAAAAAyA/8IoVs__XSGI/s400/DSCF2083.jpg)
We're now back at the corner where we came in, and about about to walk round left, in a clockwise direction, toward the covered area we can see.
![](https://lh4.googleusercontent.com/_eG-h-3kiVVA/TAluYNmKIKI/AAAAAAAAAyU/_zMyi5_IugA/s400/DSCF2088.jpg)
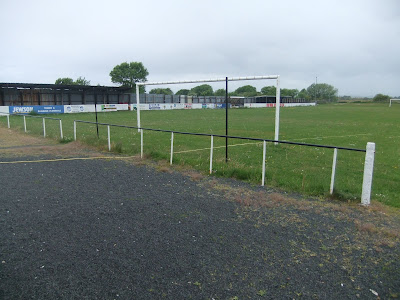
From this spot we see the terrace behind the goal, social club beyond.
![](https://lh6.googleusercontent.com/_eG-h-3kiVVA/TAluaQKrXKI/AAAAAAAAAyY/PKL9IW5meuk/s400/DSCF2089.jpg)
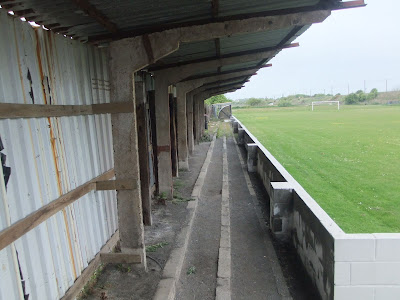
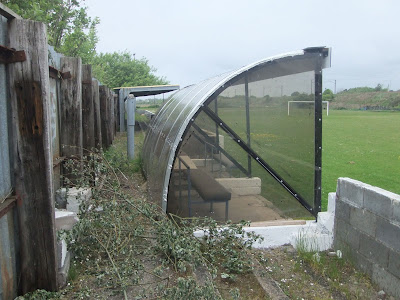
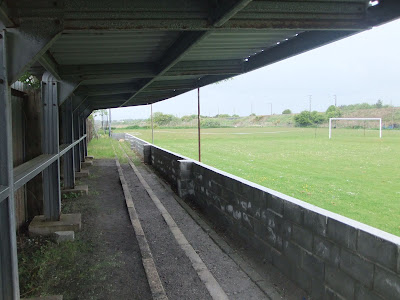
The covered terrace along the side, from the front.
![](https://lh3.googleusercontent.com/_eG-h-3kiVVA/TAlud-HeaJI/AAAAAAAAAyg/78noNMaMeSw/s400/DSCF2091.jpg)
From here we look over the pitch, where the other two sides have no spectator facilities at all, you can see a dugout on the far side. Railway line behind.
![](https://lh4.googleusercontent.com/_eG-h-3kiVVA/TAluh-kHPEI/AAAAAAAAAys/3wwgMO5z7jg/s400/DSCF2093.jpg)
Under the narrow steps of terrace below the shed roof.
![](https://lh3.googleusercontent.com/_eG-h-3kiVVA/TAlujpf3BDI/AAAAAAAAAyw/5dP2RYXSNH0/s400/DSCF2094.jpg)
Moving along we turn for a good shot of the terrace behind the goal.
![](https://lh6.googleusercontent.com/_eG-h-3kiVVA/TAlunmRKLdI/AAAAAAAAAy4/-sA7dEuU4ho/s400/DSCF2096.jpg)
Past the roof the terrace continues to the dugout on this side.
![](https://lh4.googleusercontent.com/_eG-h-3kiVVA/TAlulkrsgBI/AAAAAAAAAy0/3ynDMaTDptg/s400/DSCF2095.jpg)
This is the first dugout, look past it and you see another stretch of cover.
![](https://lh4.googleusercontent.com/_eG-h-3kiVVA/TAlup_fj9-I/AAAAAAAAAy8/ALmTbGoDGAM/s400/DSCF2097.jpg)
Here is the dugout from the front.
![](https://lh3.googleusercontent.com/_eG-h-3kiVVA/TAlu59jqrkI/AAAAAAAAAzY/80S0UH8r64g/s400/DSCF2104.jpg)
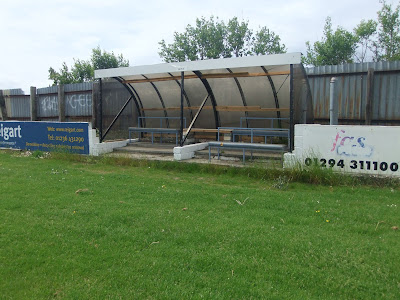
The terraced steps go on past it, to the next covered part.
![](https://lh4.googleusercontent.com/_eG-h-3kiVVA/TAlusiUgz5I/AAAAAAAAAzA/4BBniwPHKV0/s400/DSCF2098.jpg)
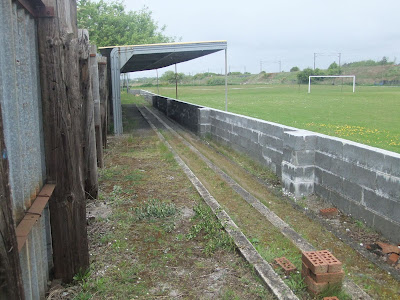
Looking along, under it.
![](https://lh3.googleusercontent.com/_eG-h-3kiVVA/TAluuTCwjSI/AAAAAAAAAzE/VED8oOS98hE/s400/DSCF2099.jpg)
The steps go on past this second enclosure.
![](https://lh6.googleusercontent.com/_eG-h-3kiVVA/TAluwd7bxhI/AAAAAAAAAzI/mFz3KmbfrN0/s400/DSCF2100.jpg)
Still under it, we see back to the dugout.
![](https://lh6.googleusercontent.com/_eG-h-3kiVVA/TAluyIBE3BI/AAAAAAAAAzM/WDx9iIWimq8/s400/DSCF2101.jpg)
From the front, on the pitch.
![](https://lh3.googleusercontent.com/_eG-h-3kiVVA/TAlvAKMhx0I/AAAAAAAAAzc/GXSkZXXPrso/s400/DSCF2105.jpg)
Time to look over the pitch to the railway line.
![](https://lh3.googleusercontent.com/_eG-h-3kiVVA/TAlu0fPoXfI/AAAAAAAAAzQ/2AOr_othd5U/s400/DSCF2102.jpg)
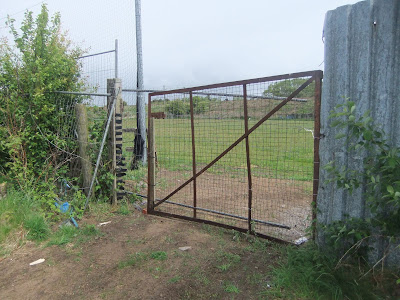
The terracing ends here. Permiter wall turns in, as if to say 'no access beyond here'. The gate on the left is where I got into the ground.
![](https://lh5.googleusercontent.com/_eG-h-3kiVVA/TAlu2b6KSdI/AAAAAAAAAzU/BguFB0cwYow/s400/DSCF2103.jpg)
From the outside.
![](https://lh3.googleusercontent.com/_eG-h-3kiVVA/TAlvC3U2uEI/AAAAAAAAAzg/LfEG44thLT4/s400/DSCF2106.jpg)
A final glimpse down this side before we move onwards.
![](https://lh6.googleusercontent.com/_eG-h-3kiVVA/TAltnGFwDkI/AAAAAAAAAww/Rym0ZOA7ONQ/s400/DSCF2063.jpg)
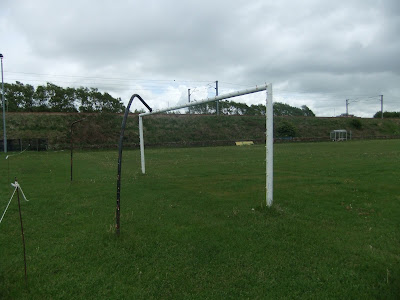
Completely open, with just a tape, behind the goal.
![](https://lh3.googleusercontent.com/_eG-h-3kiVVA/TAltph9z1qI/AAAAAAAAAw0/GDr-QufDnsg/s400/DSCF2064.jpg)
Along the touchline, pitchside.
![](https://lh5.googleusercontent.com/_eG-h-3kiVVA/TAltr2EgIaI/AAAAAAAAAw4/dcy5jgivPHo/s400/DSCF2065.jpg)
Behind the goal. It was drizzling slightly on & off, so I couldn't be bothered to wait for a train to go by as backdrop.
![](https://lh3.googleusercontent.com/_eG-h-3kiVVA/TAlttiUDhDI/AAAAAAAAAw8/ajkOPOMqYBo/s400/DSCF2066.jpg)
Up the pitch, stands to the right.
![](https://lh5.googleusercontent.com/_eG-h-3kiVVA/TAltvbcengI/AAAAAAAAAxA/1dalBlNVw_Q/s400/DSCF2067.jpg)
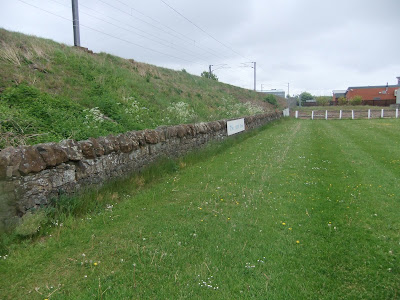
A low brick wall separates the ground from the railway embankment.
![](https://lh5.googleusercontent.com/_eG-h-3kiVVA/TAltxgqBimI/AAAAAAAAAxE/3nQk3z3QzwI/s400/DSCF2068.jpg)
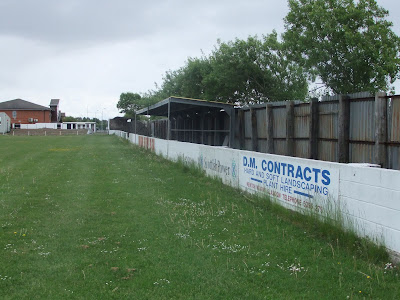
Down this side, along the brickwork.
![](https://lh4.googleusercontent.com/_eG-h-3kiVVA/TAlt0EXiwqI/AAAAAAAAAxI/soJmHBz04JY/s400/DSCF2069.jpg)
The other dugout.
![](https://lh5.googleusercontent.com/_eG-h-3kiVVA/TAlt2ZAKkdI/AAAAAAAAAxM/9uTBOEyvIRI/s400/DSCF2070.jpg)
From here we look over the pitch to the covered side.
![](https://lh3.googleusercontent.com/_eG-h-3kiVVA/TAlt6yruB8I/AAAAAAAAAxY/pLKTzqNmghM/s400/DSCF2072.jpg)
The rustier shed, we saw first.
![](https://lh5.googleusercontent.com/_eG-h-3kiVVA/TAlt4_1oHHI/AAAAAAAAAxU/Bw6tcczwYB4/s400/DSCF2071.jpg)
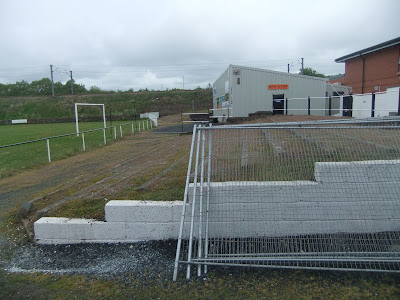
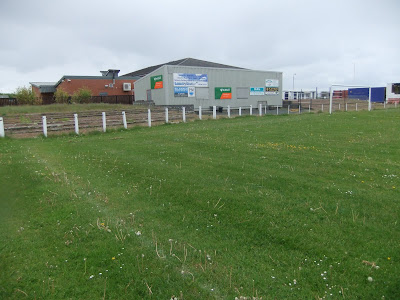
Moving on to the last corner, we can now see there is also a section of terrace ahead.
![](https://lh5.googleusercontent.com/_eG-h-3kiVVA/TAlt9XDq9AI/AAAAAAAAAxc/fDbggXaPBHk/s400/DSCF2073.jpg)
From this shot it does look as though there was once upon a time terracing all the way behind the goal, until that modern, sorry Irvine folk, monstrosity, was constructed.
![](https://lh3.googleusercontent.com/_eG-h-3kiVVA/TAlt_iJTpqI/AAAAAAAAAxg/Qja2srWB3X0/s400/DSCF2074.jpg)
Here we are at the last piece of terracing.
![](https://lh6.googleusercontent.com/_eG-h-3kiVVA/TAluB4l1STI/AAAAAAAAAxo/J4B27tZhKPk/s400/DSCF2075.jpg)
Looking along it, from the back.
![](https://lh5.googleusercontent.com/_eG-h-3kiVVA/TAluEB3j_vI/AAAAAAAAAxs/xr562O420Mw/s400/DSCF2076.jpg)
And back down the railway side.
![](https://lh6.googleusercontent.com/_eG-h-3kiVVA/TAluHDjoHGI/AAAAAAAAAxw/WCdwAs0eqrI/s400/DSCF2079.jpg)
Behind the goal.
![](https://lh4.googleusercontent.com/_eG-h-3kiVVA/TAluJbgpgtI/AAAAAAAAAx0/GD0LsOL3WDc/s400/DSCF2080.jpg)
The 'flat area' between the terraces.
![](https://lh3.googleusercontent.com/_eG-h-3kiVVA/TAluLWJULmI/AAAAAAAAAx4/ZJmsTIyrQvc/s400/DSCF2081.jpg)
And that concludes our visit here, back at the section of terrace where we began.
![](https://lh6.googleusercontent.com/_eG-h-3kiVVA/TAluNfgjUaI/AAAAAAAAAx8/nn7zegbEavg/s400/DSCF2082.jpg)
![](https://lh3.googleusercontent.com/_eG-h-3kiVVA/TAluSrC7kAI/AAAAAAAAAyI/Nb3Yf0Eemzw/s400/DSCF2085.jpg)
1 comment:
Fantastic shots - I now realise that we don't have any problems whatsoever looking at this ground...The number of turnstiles suggests that IV has seen better days!
Steve
Post a Comment